NDT Inspection
Inspecting for Surface Cracks Through Thick Coatings
Published on 26th June 2023

Image credit@cdn.reliance-foundry
Thick coatings are sometimes applied to pipework/vessels to prevent heat transfer or to structural beams for fire protection. Such coatings usually range 3–30 mm (0.12–1.20 in) in thickness and are made of epoxy, neoprene, or some advanced materials. However, in certain applications, the underlying metal can suffer from fatigue which requires inspecting around weld areas for surface-breaking fatigue cracks.
The Challenge
Detect and size surface-breaking cracks in welds under thick non-conductive coatings without stripping
Offshore oil and gas jacket structures commonly support risers carrying the product from the well to a topside processing plant. To maintain the product at an appropriate temperature and to protect the riser surface, risers are coated. This can make it more difficult to inspect risers, ultimately impacting the integrity assessment of the structure.
In a recent inspection in the North Sea, risers were 304 mm and 406 mm (12 in and 16 in) in diameter, coated with 6–12 mm (0.2–0.5 in) thick neoprene. The risers were subjected to cyclic loading due to the swell conditions typical in the North Sea. The integrity of the welds near to the surface of the sea was in question, as a result. Furthermore, the exact position of the welds was unknown due to the thickness of the coating obscuring any surface profile. The welds had to be located without removing the coating and then inspected to determine whether cracking was present. If cracking was discovered, an estimate of the size of the cracks was needed to assess the structural integrity of the riser. The critical welds were within 25 m (80 ft) of the sea surface.
Conventional inspection techniques require removing coatings before inspecting for surface-breaking cracks, and then recoating, leading to higher costs and longer inspection times. Breaking the coating barrier can also lead to other problems such as water ingress and corrosion if the coating is not consistently reapplied as originally specified.
The Solution
ACFM® probe capable of detecting surface-breaking cracks under thick coatings

While standard ACFM probes can inspect through about 5 mm (0.2 in) of non-conductive coating, beyond this their sensitivity drops significantly.
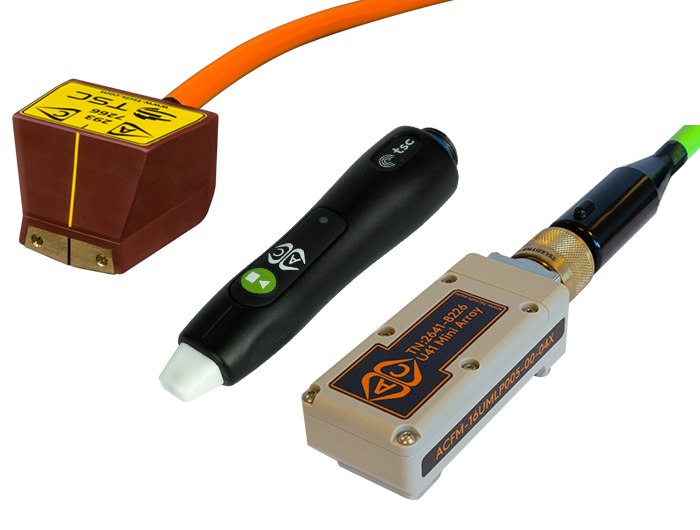
In recent years, Eddyfi Technologies has spared no effort to engineer technology capable of detecting and sizing surface-breaking fatigue cracks through non-conductive coatings as thick as 30 mm (1.2 in). This led to the development of the high liftoff probe, which consists of an eight-row (16 channels) array probe with a 10 mm (0.4 in) sensor pitch, covering 70 mm (2.8 in) of welds. This is enough to cover most weld caps, including toes and heat-affected zones, in one pass. It also means that the exact position of the weld under the probe becomes less important. The probe can be configured to find welds under coatings and deployed on other pipe geometries, above or underwater. The stainless steel feet of the probe can also be adjusted to prevent rocking on curved surfaces.
Furthermore, the probe features two operation modes: the primary mode uses specially tuned differential sensors to provide detection through thick coatings, gives surface length, and provides an indication of severity. The second mode uses absolute sensors that can size the depth and length of defects in the conventional ACFM manner once coatings are removed.
Two deployment tools were developed to allow a remotely operated underwater vehicle to successfully achieve the task of detecting welds and inspecting them with the high liftoff probe. One tool was designed to scan axially (to determine the position of the weld), while the other was designed for circumferential scanning (to fully inspect the circumferential welds).
The ACFM high liftoff probes were deployed successfully, locating and inspecting all the riser welds without removing the neoprene coating. Significant cost savings were achieved by avoiding the need to remove and reinstate the coating.
The Benefits
Better integrity assessments at lower costs
The primary benefit of the ACFM high liftoff probe is its ability to inspect simple geometry welds for surface cracking without removing thick coatings covering them, saving time and the significant costs associated with downtime, stripping, and recoating. The probe can also be used on topside and subsea structures.
In its differential mode, the probe can detect cracks and indicate their severity (depth). If more detailed information about defects is necessary, it benefits from an absolute operational mode, which enables only stripping specific areas of coating to size their length and depth. This enables more precise integrity assessments, again lowering the potential risks and costs associated with undetected or incorrectly assessed defects.


